Loading viewer...
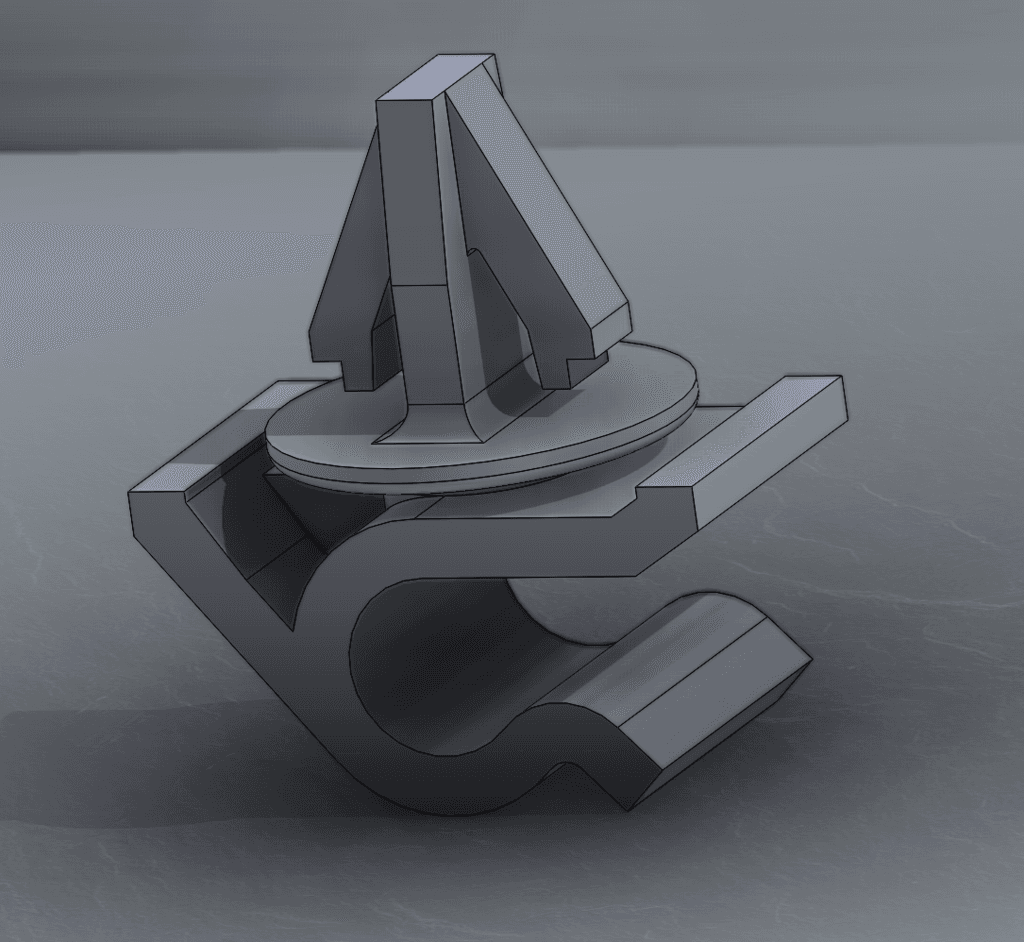
Dewalt 12v NiCd to XT60 adapter
I had an old Delwalt 12 volt drill with dead batteries and a bunch of 3S lipos from my early days in quadcopters so I figured I'd combine the two and have a functional drill again. The adapter is assembled onto the drill as the removable part is now the lipo battery. Everything prints without supports. The two clips are not exactly symmetric so I marked them left and right as you would hold the drill in use. Looking at them with the drill upside down (as you're assembling the adapter) with the chuck pointing away they will be "backwards" so the L is to your right and the R to your left. Other hardware you will need to assemble the adapter: About a foot of uninsulated 14 gauge household wiring. 7 M3x20 screws (the one that holds the retainer can be shorter). A male XT60 connector. A bit of copper clad PCB (explained below). A velcro strap to hold the lipo. I included enough room in the cap for a low voltage alarm. I made my own, but I think the cheap little battery checkers that you buy two for under $10 would work too. The bit of copper clad is used to make a small retainer to prevent the XT60 from being pulled out when the lipo is removed. Cut it to the same dimensions as the XT60 and drill two holes for the XT60 solder lugs to fit in. These holes need to be snug. Then remove some copper between the holes so the two sides don't short. Place the XT60 in its position in the cap and solder the copper clad to the lugs. You may also be able to just hot glue the whole thing, but I don't know how well that would hold up long term. After printing the parts the cap will have a layer in the screw holes that need to be removed. I include this bit so the part can print without supports and they're easy to remove with a small drill or a Xacto knife. To assemble the adapter first place the stem in place. Cut the household wire into two pieces and insert them into the holes in the stem. You should be able to feel them slide into the contacts in the drill.